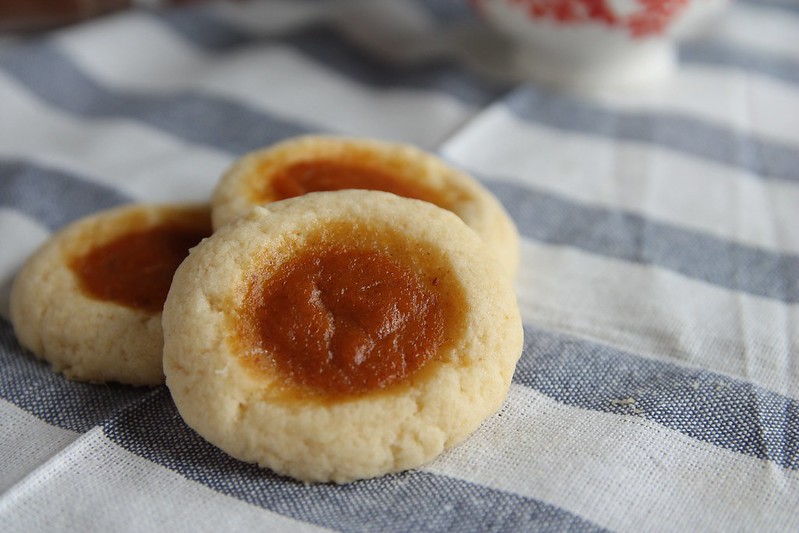
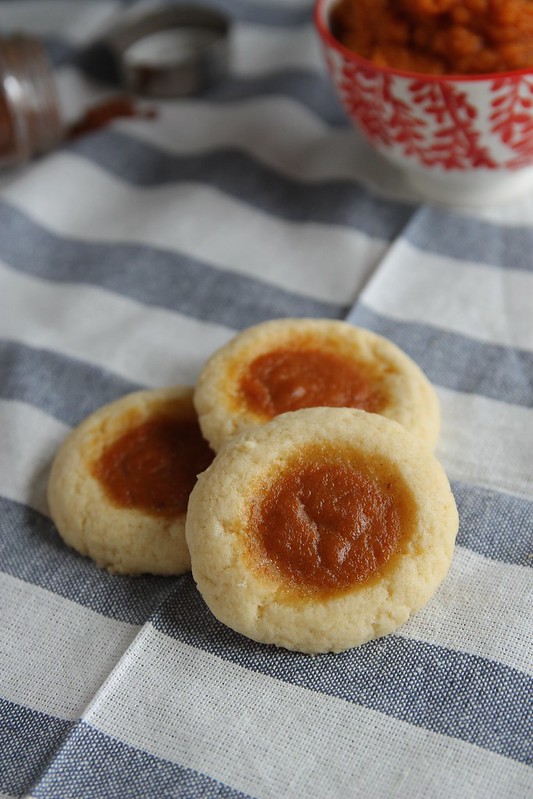
Sweet sugar cookie thumbprints filled with pumpkin pie filling. Consider these your portable pumpkin pie – because that’s clearly a necessity.

I’m not saying some genius idea just came to me in my dreams…but maybe I am. I dunno. I’m going to just leave that one open to interpretation.
Just kidding — I totally had a genius idea come to me in my dreams. What I can I say? I dream about cookies more often than I would care to admit.
I actually wasn’t sure this recipe was going to work. I wasn’t sure if the ratio of cookie-to-filling would end up being right, if the filling and cookie would set at the same time, if the filling would even stay in the cookie thumbprint…there were a lot of things up in the air about these little suckers.
But, after a few pans of finagling, I pulled out a pan of perfect thumbprints, with the cookie just barely cooked through – still a bit pale, even, a little like myself – and the filling just perfectly set. It made for a perfect soft cookie with just the right amount of pumpkin pie filling. A two-bite pie, if you will.
Stick that pie in your pocket, take it with you wherever you go*.
She then proceeded to share the cookies, because she has more self control than I do. This is why she gets the cookies.
If you’re having a crowd of family in and out of your house this week, I highly suggest making a batch of these cookies to have on hand. They’re a piece of pie cake to make, and are easier to divvy up to passing family members than an entire pie. They might even become a new Thanksgiving tradition.
*Warning: I do not actually recommend sticking these cookies in your pocket. That would be a mess. Just stick them in your pie-hole instead. xoxo
Pumpkin Pie Thumbprint Cookies
Ingredients
For the cookie dough:
For the filling:
- 1/3 cup + 1 tablespoon pumpkin puree
- 1 egg white
- 3 tablespoons sugar
- 1/4 teaspoon cinnamon
- 1/8 teaspoon ground ginger
- Pinch of cloves
- 2 tablespoons evaporated milk
Want to save this recipe for later?
Instructions
Make the cookie dough:
- In the bowl of a stand mixer fitted with the paddle attachment, cream together the butter and sugar on medium speed until fluffy, about 1 minute. Add the egg and vanilla; beat on low speed to combine. Slowly add the salt and the flour; mix on low speed until just combined.
- Roll the dough into 1-inch balls, placing them about 3 inches apart on parchment-lined baking sheets.
- Using the back of a rounded teaspoon, press the teaspoon into the top of each cookie, creating a well in the center (make sure not to press all of the way through to the baking sheet itself). Dip the teaspoon in flour or water between each cookie to make this process go a bit easier.
- Place the shaped and indented cookies into the refrigerator or freezer to chill for at least 1 hour. Near the end of the chilling time, preheat the oven to 375 degrees and make the filling.
Make the filling:
- In a medium bowl, whisk together all of the filling ingredients until well combined. When ready to bake, spoon about 1 teaspoon of filling into each of the indented cookie wells.
- Bake cookies for 15-18 minutes, or until cookies are just set and barely golden around the edges. Let cool on the baking sheets for about 5 minutes before moving to a cooling rack to finish cooling.

About Stephie
Stephie is the creator of Stephie Cooks, a food blog that focuses on creating memories around the food we share, with family recipes at the site’s heart. Stephie lives in Central Illinois with her husband, daughter, and a menagerie of cats and dogs. When she’s not in the kitchen or at her computer writing, you can usually find her curled up with a book or working on one of her many grandma-esque hobbies. Learn more >
Your cookies look delicious! What a great idea.
Thank you! If you make them, I hope you enjoy them.